Improved Clinch Knot: A Simple Tie That Holds Up on the Water
Ever had a fish on, then felt that awful pop and sudden slack? It’s usually not bad luck, it’s the knot. The Improved Clinch Knot is a go-to for tying line to hooks, lures, swivels, and flies, and it’s popular for a reason. It’s quick, it’s tidy, and it can be very strong when tied clean. It shines with monofilament and fluorocarbon, and yeah, line type really does matter.
What the Improved Clinch Knot is, and when it’s the right choice
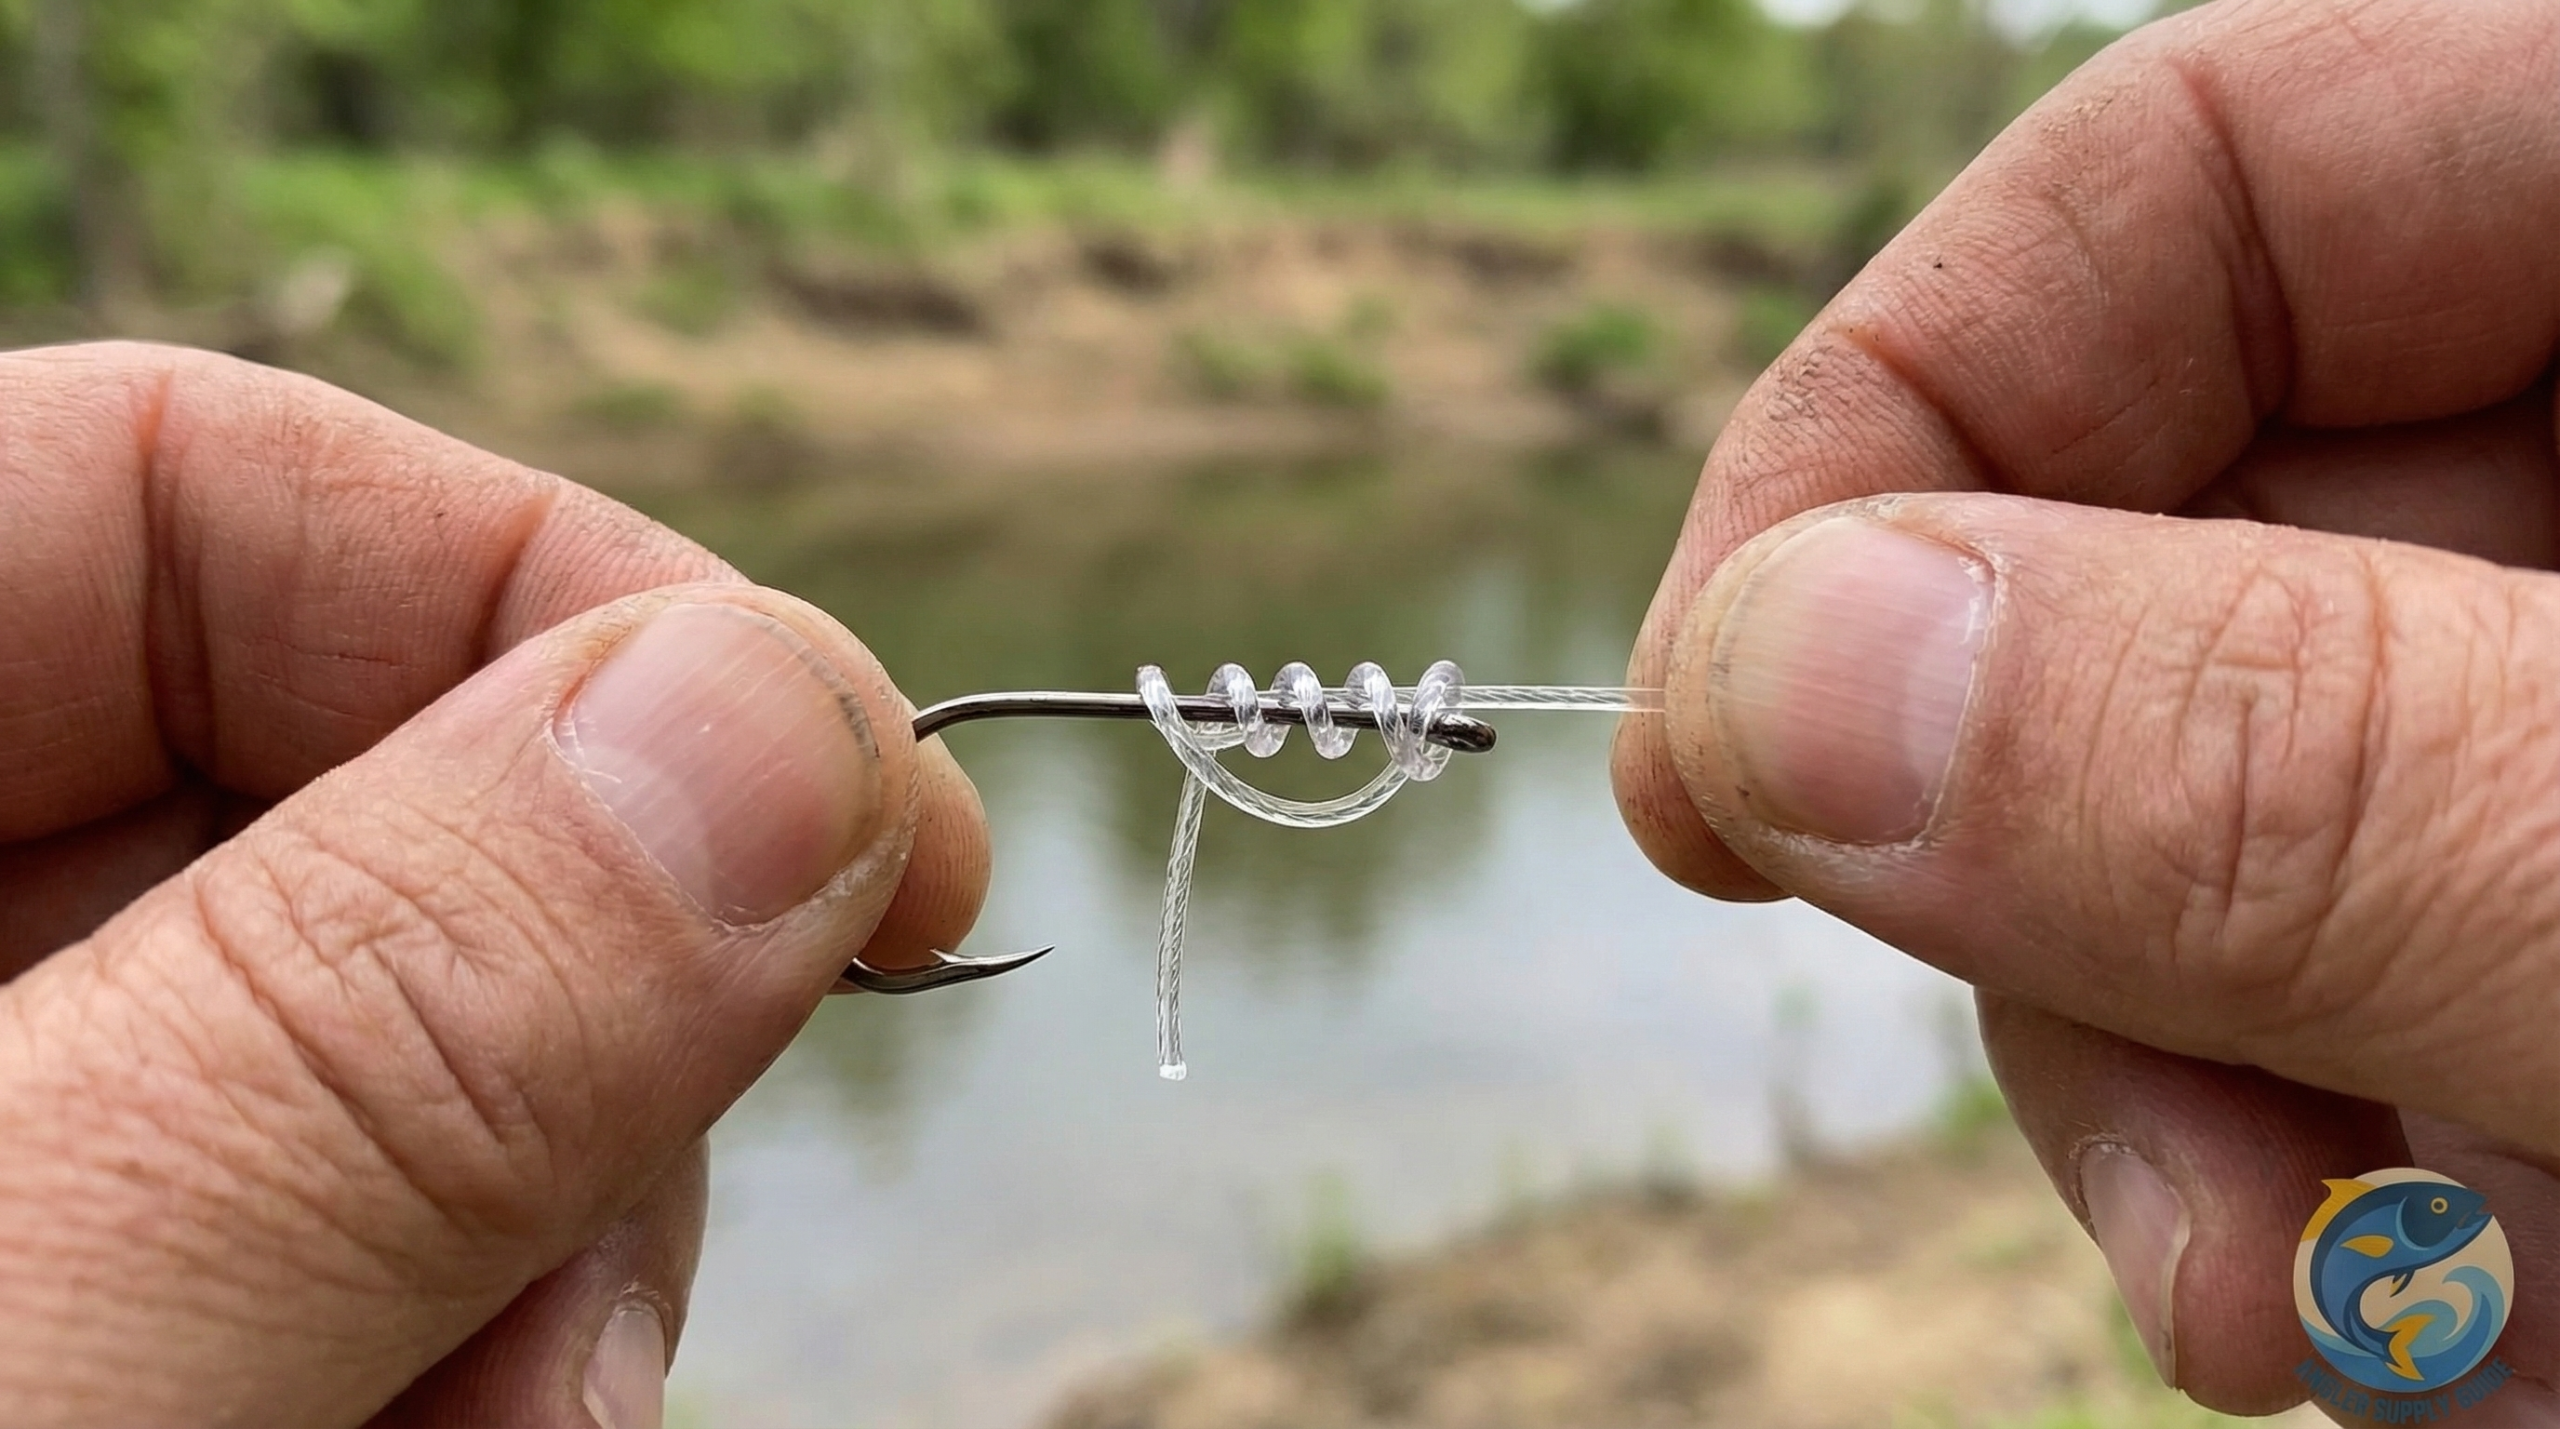
The Improved Clinch Knot is a simple knot that cinches tight against the hook eye. You make a few wraps, pass the tag end through the small loop near the eye, then do the “improved” part, you pass it back through the bigger loop you just formed. That extra tuck helps the coils lock in place instead of creeping.
I use it when I want a fast, dependable terminal knot, especially in light to medium line sizes.
Best uses include:
- Small to medium hooks (bait and finesse rigs)
- Crankbaits and jigs
- Swivels and snaps
- Fly tippet to a hook or small fly
It’s usually best on mono or fluorocarbon in light to medium tests. On very heavy leader it can bunch up, and with braid it often slips unless you change knots.
Improved Clinch vs. regular Clinch, the one extra step that helps
A regular clinch stops after going through the small loop by the eye. The Improved Clinch adds one more move, feeding the tag end back through the bigger loop. That little “back through” step gives more bite on mono and fluoro. Not magic, just more lock.
How to tie an Improved Clinch Knot (simple step-by-step)
- Thread 6 to 12 inches of line through the hook eye.
- Hold the tag end and wrap it around the standing line 5 to 7 times for thinner line.
- For thicker mono or fluorocarbon, use about 4 to 5 wraps so it doesn’t stack up.
- Pass the tag end through the small loop right next to the hook eye.
- Now pass the tag end back through the bigger loop you just created (that’s the improved part).
- Wet the knot (saliva or water is fine), then tighten slowly. I don’t rush this part.
- Pull the standing line to seat the knot snug against the eye.
- Trim the tag end, leaving a tiny nub, about 1 to 2 mm.
Wrap count cheat sheet for different line sizes
Thin line usually needs more wraps to grip. Thick line needs fewer wraps so the coils don’t jam and twist. If the wraps look bulky or uneven before you tighten, back up and re-tie. It’s faster than losing a lure.
Make it stronger, common mistakes and quick fixes
- Not wetting the knot: Dry line heats up and weakens, especially fluoro.
- Crossed coils: If wraps overlap, it can cut into itself under load.
- Yanking tight too fast: Snug it down slowly so the coils line up.
- Too few wraps on light line: Add wraps, light mono can slip.
- Too many wraps on heavy line: It bunches and won’t seat clean.
- Cutting the tag too flush: Leave that 1 to 2 mm, just in case it creeps.
- Braid issues: With braid, many anglers switch to a Palomar or Uni since braid can slip on this knot.
A fast on-the-water strength check before you cast
Before the next cast, pull steadily on the main line while holding the hook or lure. Watch the coils. They should slide into place and stop, not keep creeping. If anything looks lumpy, or it slips at all, re-tie. No debate.
Improved Clinch Knot FAQ
Strong, simple answers for one of the most commonly used fishing knots.
What’s the Improved Clinch Knot used for?
It’s a line-to-hook (or line-to-swivel) knot that’s quick to tie and strong enough for everyday fishing. I use it most for hooks, swivels, and snap swivels on light to medium tackle.
It works best with monofilament and fluorocarbon when speed matters. Think of it as the standard clinch knot with one extra tuck that helps it hold.
What makes it “improved” compared to the regular clinch knot?
After passing the tag end through the small loop near the hook eye, you run it back through the larger loop you just created.
That small step adds security and helps prevent slipping, especially with smoother line.
How many wraps should you use?
- Monofilament: 5–7 wraps
- Fluorocarbon: 6–8 wraps
- Thin braid: more wraps help, but it’s still not ideal
Too few wraps can slip. Too many can bunch up. If it looks messy before tightening, it usually won’t fix itself.
Does the Improved Clinch Knot work with braided line?
Sometimes, but it’s not a great match. Braid is slick and can slip unless everything goes perfectly.
If you’re tying braid straight to a hook or lure, A Palomar Knot is usually the safer option. If you stick with the Improved Clinch anyway, add wraps and test it hard.
Is it strong enough for big fish?
On mono and fluoro, yes — within reason. It handles bass, walleye, trout, and many inshore fish just fine.
Thick leader material or repeated heavy stress is where it starts to struggle. That’s usually when I switch knots.
What’s the biggest mistake people make when tying it?
Not wetting the knot and cinching it too fast. Both create friction and uneven wraps.
I snug it slowly, then pull tight. I also leave a tiny tag instead of trimming flush.
How can you tell if it’s tied correctly before you cast?
The wraps should be neat and snug against the eye. Then do a firm pull test.
If it slips at all, cut it and re-tie. No debate.
The Final Wrap
The Improved Clinch Knot stays popular because it’s easy to tie and solid with mono and fluorocarbon. Practice it a few times at home, then use it as your default for most everyday hook and lure connections. Keep the wraps neat, wet it, tighten slow. If you’re fishing braid or very heavy leader, switch knots and save yourself the heartbreak.